First download Amy Butler‘s yoga bag pattern. It’s free and so you suddenly find that you always needed a bag for your yoga mat. Never mind that the yoga bag travels only from the right of the computer desk to the front of the computer desk once a week. Besides, hanging the mat up on a hook would certainly lend a more professional look to your teaching room.
Read the pattern about a thousand times, decide that it’s really easy to make. Convert all the inch measurements into centimeters. Measure your yoga mat thrice to ensure that the bag will be big enough. Start looking for fabric.
Find the perfect exterior fabric only to find that it’s a) silk, b) 50€ per meter. Think about making a 70€ yoga bag for about five minutes three times daily. When your mother-in-law throws the sheets out of the window that she has used to cover the floor for some renovation work, think about whether those sheets might be perfect. Decide against the colorful turquoise-and-orange-and-red-striped with elephants pattern. Go and look for the sofa cover that you put away when you threw the sofa out. Think that you have found the sofa cover which then turns out to be leftover fabric from the making of curtains last year. (That, by the way, might have been the lowest I ever sank in my “sewing career”. I was so fed up with sewing and my machine that I had them custom-made.) So, in order to keep the budget low, decide to make a red yoga bag instead of an orange one like you wanted.
Resume quest for suitable piece of lining fabric. That has to match the exterior. Go on several expeditions eyeing expensive fabric and – this is very important – leave the exterior fabric at home. That certainly helps with the matching. Finally buy a scrap of fabric that’s on sale for 5 € with the rationalization, “Well, if it doesn’t match at least I haven’t spent much money on it.”
All the while look for interfacing. Think that you have very bad interfacing karma. Look for at least a package of thin interfacing. There used to be dozens of these in every fabric department, but nowadays you might go to a store three times without seeing even one. When at last you see some, buy every scrap of it. Vow to buy at Lisa’s store next time. A place where when you say, “I’d like some interfacing because I’m making a bag.” the salesperson won’t look at you with a very puzzled frown and answer, “So, do you need it for appliqué?” “Um, I want to make a bag out of light fabric and I need it to strengthen…” “So, you want this then?” You, meekly, “I guess so.” Just saying. And the bonus: I wouldn’t have had to spend money on three trips to the big city. Paying the shipping from London to Germany would have been cheaper. And you can bet that if you told her what you wanted she just would have known which interfacing to use.
Interfacing. I never know how much to use and which kind because, well, I lack experience and then, due to my shopping woes, I only have used the flimsy kind up until now anyway. But there is something to say for the department store I bought my fabric in because last time, when I left the store clutching my packages of flimsy interfacing and went to have a look at the sewing patterns, I caught a glimpse of interfacing on bolts! Interfacing of different thickness! Wow! Not quite the holy grail, but close.
Next decide to be sensible and put your bag project aside for a month of script frenzy. In July start agonizing about it again. Think about how to cut out something that’s 121,92 cm long. Will it all work out when you round it? Should you make a pattern first? Or not? Then remember that you own a tape measure with inches on it. Decide to make a pattern. Look for some old newspaper because you’re too cheap to buy real pattern making paper.
First day: Cut out paper pattern.
Second day: When a student cancels a lesson, start cutting out the lining. Note that the scissors that came with your new sewing machine (more on that in another post) might be worth 47 £ to someone but not to you since they don’t exactly cut. Get out the old sewing scissors of your husband’s grandmother that you have been using as kitchen scissors for the past ten years. Sigh. Lust for a roto-cutter. Look at pictures of roto-cutters on the internet. Discuss the merit of such cutters with your sister. Decide to be sensible and frugal and use the kitchen scissors instead.
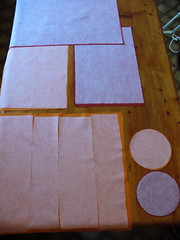
Third day: After waiting for this moment for six days, tell your family that come what may, today’s the day you will cut out your DAMN BAG PARTS! Cut them out on the floor because you don’t want to occupy the kitchen table and your writing desk is too small. Get really distracted by reading the ads on your pattern. Remind yourself to use real pattern paper next time so that you don’t have to look at disgusting “sex on the phone”-offers for hours. Find that not even one angle you have cut out is straight, nor anything. If every single bag part is crooked, will the bag turn out okay? What if the exterior and the lining bag are different sizes? What if the lining bag is bigger than the exterior bag? Calm yourself down so that you won’t have a nervous breakdown with the thought that it isn’t woodwork or rocket science. Since you can’t sew a straight line anyway it will all sort itself out somehow in the sewing. Wonder if this is like when you’re recording something that you just can’t get right and then you just leave it at that, telling yourself you will “fix it in the mix”. (That never works by the way. You can make things better but you can’t make bad things good. Better to start with something good and make it better…) Tell yourself that this is only a practice bag anyway. Stress out about your really complicated dress project that you want to sew after that. Take out Liesl’s backpack pattern, carefully study it and decide that you’re never be able to make it. Then think about altering it because you don’t like magnetic snaps. (I didn’t say I was logical, didn’t I?)
Find that you still have a little time before dinner and start ironing the interface parts to the fabric. After all you decided to use flimsy interfacing on both the exterior and the lining. Find that you have just about enough flimsy interfacing to do this if you practice “patchwork interfacing”. Since you lost all patience when cutting out the interfacing and just did it by rule of thumb and where the scissors hit since it doesn’t really matter if the interfacing isn’t as big as the fabric, everything looks a little, um, sloppy. Remind yourself to next time turn the interfacing right side up before cutting. So when you iron your uneven and crooked pieces of interfacing to your uneven and crooked pieces of fabric at least they pretend to fit. Congratulate yourself that at least you haven’t ironed interfacing to your pressing iron. Find that you can pull off already fused interfacing from the ironing board quite easily. Use the quickly cooling iron to iron a tablecloth and a napkin.
Fourth day: After realizing that two students in a row canceled their lessons plan to start sewing the bag. Meet husband for lunch who then reminds you that the berries are ripe. Sigh. Gather berries, clean berries, don’t finish this because it takes so long, lose hope. When another student calls in sick, find that your husband has prepared all the berries and start pinning and sewing. At the end of the day you will be very tired, have severe neck and back pain, an outer pocket pinned to the main panel of the bag and rows of jam glasses:
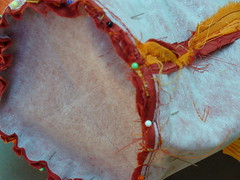
Fifth day: Promise yourself to go on slowly and careful, start sewing in the morning, and become quite confident and optimistic. Though everything is quite crooked, it is starting to look, well, like an actual bag. Though very small. With bulging and wavy seams. Like the following:
(Yes, I know that seam allowances shouldn’t look like this.)
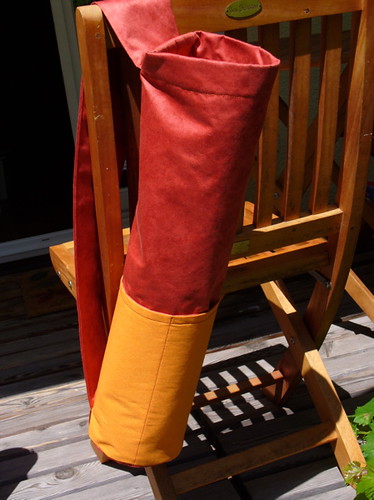
Manage to somehow put it all together. A little hint: having uneven and crooked pieces doesn’t really help with the alignment. Spend some time with your son and his friend. Cut your son’ hair when his friend is gone. Find that you still have about half an hour before dinner. Put your son in front of a DVD. Finish bag. Keel over. Write a blog post. Take pictures of finished bag.


